
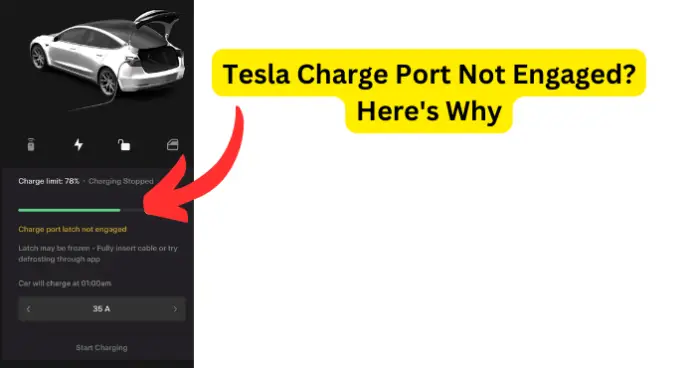
You see a dreaded notice that your charge port latch is not engaged. Until now, you were feeling pretty good as you pulled up to the charging station to recharge your environmentally-friendly Tesla.
Certainly, you did not anticipate this happening. Take comfort in knowing that there are several troubleshooting solutions available.
Perhaps you were confident that you could handle your Tesla’s user-friendly charging process, but as luck would have it, you encountered a hiccup upon attempting to charge your EV (electric vehicle) this goes around.
You are not alone, Tesla owners may encounter this issue now and again, but you need not get flustered. Fixing this snafu is very doable with the help of just a few, or rather, slightly more than a few troubleshooting cues will get you charging again in no time.
But before you delve into the world of troubleshooting, did you make sure that you fully inserted that cable?
Why is Tesla Charge Port Latch Not Engaged?
1. Outdated Software
The Tesla firmware needs to be running the latest version of the software- Did you ignore that last software update or simply miss it somehow?
Technology is always changing and ever-evolving, and with that change comes mandatory updates to make that technology work optimally. Now would be the perfect time to check to verify that your software is up to date and running the latest version.
Fix – Update Tesla software
- You can easily check for software updates right on your Tesla App, or you can opt to visit the Tesla website for instructions and update download information specific to the Tesla model that you are driving. It would seem that a missed software update wouldn’t have a negative impact or any impact at all on a charging port engagement, but it can, actually.
- After verifying that you are indeed up to date with the latest software, you may want to adjust your Tesla setting preferences so that you can avoid manually updating the software going forward. To do this, go to Controls > Software > Software Update Preferences… then simply select an option that takes you and your busy self out of the equation to keep your EV’s firmware current. Chances are you already took care of this detail way before reading this. Right?
2. There’s A Glitches
Even genius software can misbehave. – Glitches are a possibility, software glitches, that is. If the software update check was not the issue or even a concern, then there is one more thing to check, on the software front, before letting software off of the proverbial hook.
As a precaution, reset the software system. A reset will not harm your Tesla, even if, after performing a reset, you discover that your software was glitch free all along. You should just do a reset to ensure that your software system is running as smoothly as your Tesla drives you from point A to point B!
You can perform a software reset on your Tesla right from the steering wheel. Resetting the software isn’t as daunting as it sounds. This is an easy troubleshooting process that will help you to deduce what is causing the issue with the charging port engagement or lack thereof.
Fix – Reset Software System
- First, you will need to be seated in front of your Tesla steering wheel.
- Use your fingers and hold down both scroll wheels simultaneously. The scroll wheels are located on the steering wheel of your Tesla vehicle. Make sure that you hold both buttons down together until you see the Tesla logo appears on the screen. The appearance of the Tesla logo on the screen indicates that the system has restarted successfully, and you have reset your Tesla software just like a rockstar! Congratulations are in order! Now try to engage the charging port again.
Note: It is advisable to troubleshoot both the Tesla software for updates and to do a reset of the Tesla software system to remove any possible glitches.
Addressing both software facets while ruling out problematic software as a whole completely before moving on to the next troubleshooting task. Both software concerns share equal importance in getting your Tesla’s charging port engagement issues resolved.
3. Debris & Foreign Matter
Clean cables and ports ensure a successful charging experience. Proactively check on these car parts occasionally to have your Tesla at peak performance.
Fix – Clean your charging port
- Look for dirt, debris, or an obstruction. Check your adapter for dirt, corrosion, or anything foreign that could possibly be the culprit. 2)
- Check the charging port as well for the same. If you notice any dirt, debris, foreign matter, or corrosion.
- Use compressed air, a soft brush, or a soft cloth to gently clean and clear away any matter causing obstruction.
- After you have determined that you have cleaned the charging port and the adapter sufficiently, try to reconnect the charging port to the adapter again.
Note: Also, take a moment to thoroughly inspect the charging cable itself.
Check out if it is adequately and securely plugged into the charging station and into the Tesla. Tesla owners sometimes discover that they casually glanced at the cable and charging port during the charging process.
It’s understandable that you could have taken for granted that you had fully connected the adapter to the charging port.
Take a closer look to troubleshoot the connection. Begin by double-checking both ends of the cable to ensure a secure connection and proper alignment.
You may need to realign your latch if the latch appears misaligned. Only use Tesla’s official guidelines should you attempt to make any adjustments by yourself, of course.
You can locate the Tesla official guidelines conveniently on the Tesla App or on the Tesla website. The owner’s manual is another resource that can provide you with the official guidelines for realignment.
Keep a keen eye out for faulty springs and for latch mechanisms that are worn out as well. Faulty springs and worn-out latch mechanisms are all evident signs of normal wear and tear, so don’t be alarmed.
However, exercising caution is paramount, as improper adjustments may cause even further damage. You may need extra lighting or eyewear to get a better, detailed view of the components involved.
At this point, should you feel that you are potentially risking your safety or that feel that your comfort may be compromised by doing these procedures, it is highly recommended that you use an experienced Tesla professional to perform any maneuvering deemed necessary.
4. Charging Station May Be Incompatible
Non-compatible charging stations will block you from successful charging port engagement. The possibility that you could be trying to use a non-compatible charging station to charge your Tesla is often overlooked.
Believe it or not, some charging stations don’t have the capacity to charge your particular Tesla model. A non-compatible charging station could be the very reason engagement is not occurring between the charging station and the Tesla charging port.
Fix – Verify compatibility
- Check the charging specifications located in your Tesla owner’s manual in order to confirm that the charging station you’re using supports and matches your Tesla’s charging standards. CHAdeMo, CCS & Tesla Supercharger Network are the most common; however, make certain that you know which exact charging requirements are necessary for your Tesla vehicle model.
- If no compatibility discrepancy is detected, then try switching to a different cable and try charging your Tesla again.
5. It’s Too Cold Or Icy
Cold weather will not play nicely with you at the charging station, especially ice. You will encounter a problem with charging port engagement if your current climate is icy or extremely cold. Ice is another obstruction to look out for on the cable and charging ports.
One way to offset the cold climate charging obstacle is for you to take proactive measures and set up your charging preferences to curtail and make allowances in order to charge your Tesla under climate circumstances that are ideal.
Fix – Make adjustments to Scheduled Charging
- You will need to go into the schedule settings in order to customize your charging situation. Schedule Settings can be found on the charging screen and on the climate control screens.
- You will want to set your preferences in a way that will enable conditions or preconditioning parameters for future charges in case the weather is cold or icy.
Note: Also, it would be prudent, while already in this mode, for you to set up new departure times that will align with your personal preferences and travel plans.
Owning a personal vehicle requires learning about how to operate it, and learning to operate it requires a certain skill set on how to deal with unexpected occurrences. Traditional and Electric Vehicles are equally capable of challenging owners with the unexpected.
Knowing your car takes time and experience but don’t be discouraged if you need to tackle a challenge. It’s part of the process, and solving the issue has its own rewards.