
The 240V outlet provides fast charging of 29 miles per hour for your Tesla electric vehicle. This is just as efficient as the Tesla wall connector, and so many users want to get this outlet as it is a lot cheaper than the Tesla wall connector.
However, there has been lots of conflicting information about using the 240V outlet, including questions about whether it is recommended in the first place, the best way to install it, the best accessories to use, who best to install it, and lots more.
In this article, I will be providing you with accurate and verified answers based on Tesla best practice recommendations as well as personal experience. Let’s dive in straight away!
Can You Plug Your Tesla Into a 240V Outlet?
Yes, absolutely. You can plug your Tesla vehicle into a 240V outlet and charge your Tesla without issues. As long as you have the outlet set up the correct and recommended way, it’s perfectly fine to plug your Tesla into a 240V outlet.
Also, if you already have a 240V outlet in your building, it is likely to be supported by Tesla as well. You can check out the supported adapters here.
A 240V outlet is the ideal power for charging your Tesla. Tesla’s recommended charger, the Tesla wall connector, also supplies 240V to your Tesla. So, as long as the outlet is set up right, you can plug your Tesla vehicle into it.
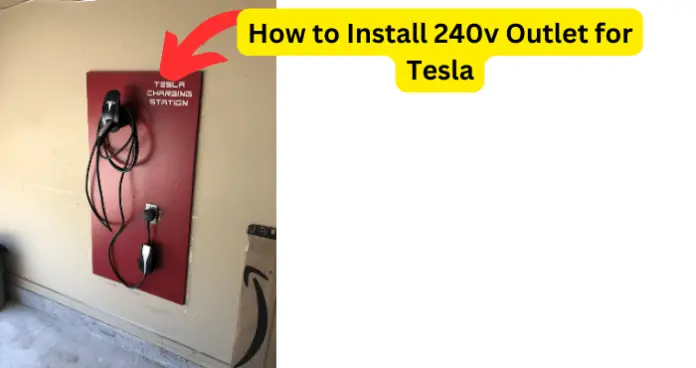
How to Install 240v Outlet for Tesla
Before providing the steps for installing the 240V outlet, I must first provide you with comprehensive information on the prerequisites for installing the 240V outlet for safety, performance, reliability, and durability.
Your Tesla vehicle is likely to have come with a mobile connector, a 20-foot long cable, and a set of adapters. Make sure to use only the NEMA 14-50 adapter for your 240V connector. With a NEMA 14-50 adapter, you can charge at 29 miles per hour, which is just about the same as using the wall connector.
- If any modifications are to be made to the electrical connections in your home, make sure that the electrician obtains the necessary paperwork
- Voltage: Single phase, 208-250 Volt AC supply, at 60 Hertz frequency
- Current: 50 Amp circuit breaker or 40 Amp continuous current
- Wiring recommendation is 6-3 American Wire Gauge
- Use copper conductors only
- High-quality, industrial grade receptacle only must be used
- Installation Location: Ensure that it is near the position of the parked Tesla vehicle, especially near the vehicle’s charge port. No more than 15 feet away, and at least 18 inches above ground.
Now that that’s sorted, let’s have a look at how to install the 240V outlet in your building.
Materials you will need:
- 2-pole 50 Amp circuit breaker
- American Wire 6 gauge with 3 conductors and a ground wire. You will see this as a 6-3 wire. 6 is the thickness of the wire while three is the number of conductores or wires inside, plus the ground wire (making it 4 wires in total).
This is the most cost-effective wiring option. The length you buy will depend on the distance between the circuit breaker and the position of the 240V outlet
- A screwdriver
- Two ¾ inch connectors
- Metal electric box
- A multimeter that is able to check AC voltage
- The supplied NEMA 14-50 adapter
- A jabsaw or drywall saw
Procedure For Installation
- You will want to purchase your 50 amp 2-pole circuit breaker beforehand because it may not be easy to come by in local and mega electrical shops. This is especially true if yours is a Cutler Hammer CH-250 (view on Amazon). You can order one on Amazon and make sure you have it before the installation project. Look in your circuit breaker panel to find out the type of circuit breaker that you need to purchase
- Get on your main power panel or circuit breaker and unscrew it from the wall. You will need a screwdriver or a power/electric/automatic screwdriver for this. Make sure that you place the screws in a secure location.
- When you open the panel, I strongly recommend that you switch off the main. A seasoned electrician may not need to do this, but you sure do.
- Next, you will need to find the studs in the wall which have the wiring outlets. A good way to find this is to knock on the wall and look for a solid sound that’s different from the hollow sounds in other parts of the wall.
- When you locate the solid sound, use a magnet to pinpoint the location of the screws inside the wall. Your magnet will stick to the wall at the exact location of the screws. Use a pencil or marker to mark this point.
- If you want to install your 240 volt outlet in this location, then you can stop here. If not, you will need to continue the tracing steps above to locate all the studs in the wall until you get to the position where you want to install your 240 volt outlet.
- Just remember that the position of the 240 volt outlet must not be more than 15 feet from the charge port of your vehicle. I suggest placing the 240 volt outlet at the nearest stud to your circuit breaker panel.
- Next, at the spot where you have located the stud, use your metal electric box to trace out the space where it will occupy on the wall.
- Cut the shape that you have traced out, using your jabsaw
- Then place the electric metal box inside this hole and make sure that it fits firmly. When you confirm that it fits, remove the electric metal box.
- Now, lay out your wire from the circuit breaker panel to the 240V outlet location, to determine how much wire you will be needing for the project
- Locate a hole at the base of your circuit breaker panel. You will normally find this as a partially bored hole at the base of the panel. Use a metal object like your screwdriver to completely open the hole
- Mount one ¾ inch connector on the wire and tighten it down
- Now, pass the wire through the hole that you made on the wall, going inside the wall, and then coming out to the whole that you made at the base of the panel
- Pull the wire through the wall until the ¾ inch connector thread comes out at the base of the panel
- Put the nuts on the connector and tighten it up.
- Put the second ¾ inch connector at the other end of the wire that comes out at the 240 volt outlet but do not secure it yet
- Then, pass the electric metal box through the wire until it fits in the hole that you made in the wall
- The metal box may not go into the whole easily, so you may have to use a hammer to hit it in gently
- Screw the metal box into the wall on either side of the box and at the center
- Then put the nut on the connector and tighten it up
- Cut out the external wire to reveal the three conductor wires and the ground wire
- Make sure that you have at least 6 inches of wire from the metal box to the outside so that you have enough wire to work with
- Now, install a 10 gauge pigtail wire to the metal electrical box
- Get a Wago 6-1-3 and connect the pigtail that you just installed on the metal electric box, as well as the ground wire from your 6-3 gauge, to the 6-1-3 Wago
- Also, connect another pigtail wire to the Wago. This will go out to the NEMA 14-50 adapter
- Press these cables back in securely inside the metal electric box so that you are having just the one pigtail ground wire coming out of the box
- Bring the NEMA 14-50 adapter and connect the pigtail ground wire to the top of the screw terminal
- Then connect the black wire conductor to one side of the panel and the red conductor to the other side. It does not matter which one you place in which side
- Place the neutral at the bottom terminal
- Screw all the wires in and make sure that they are secure in the terminals
- Now, navigate the cables and 14-50 connector into the metal box and screw the box into the all
- Next, go back on the main circuit breaker panel and also pull out the three conductors and the ground cable from the casing cable
- Connect the ground wire and the neutral cable together inside the panel
- Then connect the hot conductors (red and black) inside the 50 amp circuit breaker and then fix it into the panel
- Finally, use a voltmeter or multimeter to test the output from the 240 volt outlet and confirm that you have at least 240 volt supply.
How Much Does it Cost to Install a 240V Outlet?
How much it costs to install a 240-volt outlet depends on:
- Which of the materials you already have
- Where you purchase your materials and what quality you purchase
- Whether you are doing the installation yourself or contracting an electrician to do it
If you are doing the installation yourself, it shouldn’t cost you more than $70 to purchase the accessories needed.
If you are contracting an electrician, the labor shouldn’t be more than $30, in addition to the cost of materials.
How Long Does It Take 240V Charger to Charge Tesla
If you are doing the installation yourself, and are not an expert in electrical DIY, then it will take you a couple of hours to get it right.
An electrician who knows what they’re doing will take minutes to get this done.