
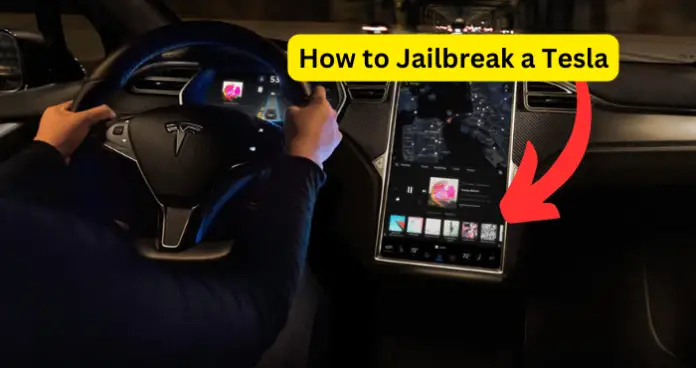
In this article I will be talking about how to jailbreak a Tesla, no matter the model or model year.
In case you didn’t already know, jailbreaking is simply technical speak for bypassing the software restrictions placed on a system by the system manufacturer. Jailbreaking may allow you to achieve any of the following:
- Having access to software features that you shouldn’t normally access with your current system configuration
- Having access to root configuration and codes that should normally only be accessible to the system manufacturer
- Installing or removing software or software features that you shouldn’t normally be able to install or remove
In the case of a Tesla, you are likely to see people looking to jailbreak their Tesla to have access to features like autopilot, premium connectivity, and other paid features on a Tesla.
If your interest is in amateur research on the underlying software programmes of a Tesla vehicle, then this article is likely not for you because it doesn’t go into deep technical and coding details.
The purpose of this article is to present a general overview of what it means to jailbreak a Tesla, the basic requirements you may need, general steps to take, and how to get comprehensive assistance on jailbreaking a Tesla.
Why Tesla Owners Want To Jailbreak Their Tesla
You may feel justified to jailbreak your Tesla because you feel cheated by Tesla. Here is a common example. Say, you purchased a used Tesla vehicle from a local dealer who, in turn, purchased the used Tesla from a Tesla auction. Now, the vehicle is advertised as having Enhanced Autopilot. You may already know that Enhanced autopilot as a service costs a whopping $6000.
So, you take delivery of the used Tesla and Tesla remotely removes Enhanced Autopilot simply because you didn’t pay specifically for autopilot as did the original owner of the Tesla. This, and similar cases have caused many users to look for ways to jailbreak a Tesla and restore features that they believe is rightly theirs to have access to.
At this point, I would like to clearly state that jailbreaking is not recommended or encouraged on this site. This guide is simply for educational purposes. Having said that, let’s go ahead and dive into jailbreaking a Tesla Model S, X, 3 or Y.
How To Jailbreak A Tesla
- Before you start, please note that jailbreaking is a highly complex process that is usually reserved for highly skilled technical experts. If you get anything wrong, you may end up completely disabling your Tesla or requiring repairs that will cost you a lot more than the feature that you are trying to access through jailbreaking, in the first place.
- Secondly, jailbreaking at Tesla is a time-consuming project that will take you several hours at the least. So, plan for that.
- Thirdly, note that any feature that you jailbreak is no longer covered by warranty. So, if you have any issue with that feature or component in the future, then you would have to pay the full price for repairing it, even if it is still under warranty.
- The method to jailbreak a Tesla depends on the feature you want to have access to. The different methods for the different features vary greatly and cannot all be covered in this article.
Step One – Locate And Connect To The Backend Ethernet Port On The Tesla Dashboard
You may not know this, but your Tesla vehicle does have an ethernet port hidden somewhere. However, it is not the standard Ethernet port that you use to connect to a router, or any other Ethernet enabled device.
So, where is this Ethernet port? Well, it depends. You may find it on the left side of the dashboard when you have snapped back the panels, especially for Tesla Model S. Or you may find it in the driver’s footwell, especially for Model 3 Teslas.
You may already know that standard RJ45 plugs feature eight (8) pins to which the wire strands of a cable interface electrically. Each plug has eight locations.
But, for the Tesla Ethernet port in question, the cable connector has 5 pins: 4 usable pins, while the fifth one that serves as an earth. Also, the pin connections for the 4 pins are quite different from that of a standard RJ45 cable connector.
So, getting the right cable connector for this Ethernet port is not as simple as walking over to Jo’s Electricals around the corner. To make things easier for you, you can head over to Amazon and buy a 5-pin adapter.
If that does not work, you may need to do some DIY:
- Solder a standard 4-pin header socket. I recommend using hot glue to ensure durability, and to eliminate the possibility of short-circuiting down the line.
- Then, carefully, plug the socket into the white ethernet at the driver footwell or left side of the dashboard, depending on where you find yours. Make sure that all 4 pins fit exactly into the first 4 pins in the port. The port has a fifth pin, but you do not have to worry about that for this project.
- The best way to know that you have the right connection is if the green wire in the cable points forwards while the orange wire points towards the rear of the car.
- Once you have the cable connected to the ethernet port on your Tesla, connect the other end of the cable to your laptop.
Step Two – Force Your Laptop To Use Tesla Custom IP and Subnet
- What does this mean? It means that you need to assign a static IP address and subnet mask to your computer when connecting to the ethernet port. Here’s how:
- Right-click on your internet connection and click on Properties
- At IP address assignment, click on Edit
- Change from Automatic DHCP to Manual and then enter 192.168.90.110 as IPV4 address and 255.255.255.0 as Subnet.
- Now, you can communicate directly with your Tesla’s MCU without hassle. You will find that the port runs a duplex ethernet connection at 100 Mbps, with SSH, HTTP, Telnet, DNS, Remote Procedure Call, NFS, and X11 all open. These ports are open to allow connectivity between your Tesla and Tesla networks.
- To confirm, you may need to install security tools like Wireshark or run a simple Nmap check like this: nmap 192.168.90.100 -p8080,22 –Pn using Command Prompt in Admin mode. This means that you are mapping the network connection on the provided IP address on port 80 for HTTP, and 22 for the Interface.
You will find that the vehicle is built on a Linux distribution, usually Ubuntu. Using port 80 on the browser, you can view what’s currently on, on your Infotainment system. Other components you will gain access to are:
- The RAM
- EMMC flash memory
- Controller Area Network
- FTDI serial interface
At this point, you have gained access to Tesla’s core control plane, firmware, and network. You can then proceed with the jailbreaking steps that work for the particular feature you are trying to access.
You can get access to Tesla’s electrical diagrams and other features that may help your jailbreaking quest, by signing up here. It is a Tesla website dedicated to providing technical resources to professionals who repair and maintain Tesla vehicles.
Just so you know, for some features, jailbreaking does not stop at gaining the access described above. For example, for Enhanced Autopilot, you would need to do lots of technical work and purchases including:
- Changing instrument cluster
- Changing wheel button controls
- Changing the thermal control module
- Replacing the brake booster
- Adding a junction box, and so much more.
A word of advice? Make sure that you have ALL the information you need from start to finish before starting a Tesla jailbreaking project. You can get on sites like Reddit, GitHub, and Tesla Owners Online to get help from other users who have completed a jailbreak on Tesla. They will not post the full information publicly, so you would have to maintain private communication with them.
Alternatively, you could contact professionals like Phil Sadow, who help disgruntled Tesla owners that have a genuine case for getting access to certain features on their Tesla. Here is Phil’s YouTube channel