
Condensation in the tail lights is a common problem. It is a known Tesla issue. It is very annoying and unsightly. Condensation on the tail light can also be found in other car brands such as Alfa, Audi, Porsche and BMW which tend to also mist up.
Minor condensation is supposedly “normal”. If water droplets are being created there is too much condensation.
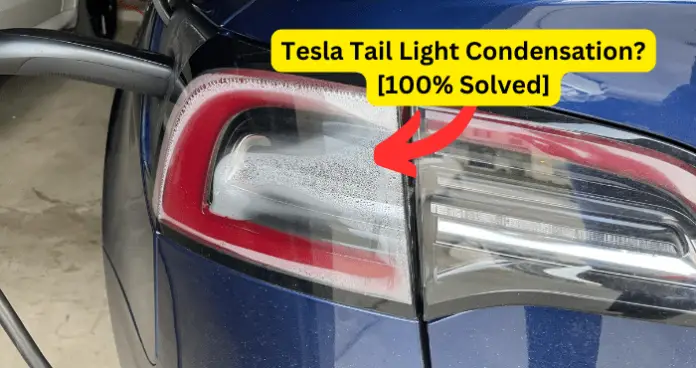
Why is there condensation on Tesla tail light?
Here is why your Tesla has condensation.
1. LED lamps can’t clear up mist
Older car lights were conventionally powered by 12V filament bulbs which generate a moderate amount of heat. If there was moisture within the light cluster or headlamp unit the heat from the bulb would generally evaporate it and keep the light clear.
Modern cars use LED lamps which only generate heat at the rear end of the unit where the electronics are housed. That causes cold spots at the front of the lens and any moisture within the lamp housing is going to condense there and is going to form fog or water droplets in the inside of the lens.
Fix – Tesla should replace your tail light if you contact them. Replacement of tail light happens only if you are still within the warranty period you can have it replaced at no cost to you.
Reach out Tesla, call them will send a mobile ranger to come and to replace your tail light that has condensation with a new light wherever your car is situated including your driveway or office parking.
Unfortunately for some Tesla owners, they have had the tail lights replaced more than once. Maybe because of a defective first replacement that may have had a chip in it. Ensure that your technician checks for any cracks in during installation.
Do not leave the condensation to evaporate or wait for the hot weather to clear the condensation. High temperatures will not work. The inside of your tail light will just turn yellow and starts looking like old headlights on a battered car.
When your tail light is replaced, make sure there isn’t a snap/pop during installation. That means the seal cracked on inside of the light and condensation will return.
2. Design flaw
Why is it that some Teslas fog up much more than others?
If you are not falling within the warranty period and Tesla cannot replace your tail lights or prefer to DIY you can try to fix the Tesla tail light that has condensation yourself.
Here are steps to follow to remove the moisture droplets in your Tesla tail light:
Take out the tail lights and look at the problem in greater depth
You will need a small screw driver, an 8mm socket on a ratchet, a plastic prying tool and a little clip removal tool.
To take out the light from the model 3 trunk lid
- Use the plastic prying tool to remove the trim. Pull the trim firmly to separate it from the trunk door. It will not break even if you pull it firmly. Now you can access the clips.
- You will see a connector with a tab. Push down on that tab with the tip of your screw driver
- Press the tab in and give the connector a good tag. Notice that the connector is a waterproof connector. It has a pyloric gasket so water does not tend to get in via that connector
- There is only one bolt holding that one nut within the light. Take your 8mm socket on a ratchet and trace the nut and loosen it off. It’s easier to loosen the nut by taking the last few turns with your finger
- They are a couple of locating clips. Get in between the light unit and the trunk with the plastic prying tool to ease up the tension and free the light unit from where it is housed.
- Once you have released the light unit with the plastic prying tool lift it up from the trunk.
Now you have completed the process of taking out the light from your Tesla model 3 trunk you can proceed to look at the condensation problem in further detail.
- Inspect your light. What is the extent of condensation? Are there water droplets everywhere? Is there water pooled anywhere within the light or are there scattered drops?
- Look at other aspects which are supposed to prevent condensation. There is a manufacturer mark informally known as a breather hole. There is also a connector with a foam around it that uses a waterproof plug so that should work. Check if any of them is punctured
- Check whether the GORE® automotive vent is perforated. This is a round blue breathable patch that is designed to keep moisture out.
It is designed by the same people who manufacture Gore-Tex the clothing line which is waterproof, windproof and breathable.
It is not advisable to plug this hole. The wiser course of action is to discover the source of condensation and fix it. In short it is better to remove the moisture in the first place to give the GORE® automotive vent a better chance of preventing condensation in the future.
The GORE® automative vent is also found on Tesla Model 3, S and X B-Pillar cameras to reduce condensation prior to 2019 but have since been discontinued. Teslas now rely on ventilation system and cabin heating to clear any misting that happens with any of those side cameras. Turn your air conditioner on and/or heating up to clear any misting on side cameras by directing the heat and air to the side windows.
- The tail light is made up of two halves the lens and the back part. They are welded together to form a light unit. Unfortunately, if you take a closer peek at the welding, you will notice that it is not completely even all the way along the seams. This could be the source of the entry of moisture into the tesla tail unit leading to condensation.
The car industry uses the following types of welding: vibration, ultrasonic, hot plate, hot air, infrared, laser and hybrid to ensure that all the car parts are properly sealed to prevent the water from getting in.
To figure out the source of your tail light condensation issues do a water test similar to the one conducted on a tire to find puncture points. Here’s how you do a water test:
- Connect a pipe or tube to the connector on the tail light unit
- And put tail light in an inch of water in a tub so that the plastic weld is covered
- Blow into the pipe or tube and if there are any leaks the bubbles will emerge from that point.
- Mark the point where the bubbles are emerging. Keep blowing until you see bubbles form and mark the new points as well. These are the areas where the water can enter the tail light unit and fog it up.
- Apart from the welding also check whether there are any cracks or breaks in the unit. Water can creep in through these fissures.
- Also check whether there are any areas which are may have been missed during the welding process and are left exposed to water penetration
So far by taking out the tail light unit and investigating it you have across five problems that could be the culprits for the water condensation
- A perforated connector
- A punctured GORE® automative vent
- Poorly welded seams between the lens and back part of the tail light unit
- Cracks or breaks in the tail light
- Unwelded areas of the tail light unit
Since all these problems occur in the same light unit and are closely related, they can be fixed the same way.
Fix – Dry the tail light units inside and get rid of the moisture. To do this:
- Remove the GORE® automotive vent patch carefully using a small knife or box cutter. Be careful not to tear it. It can be reused after the tail light unit has dried out. The adhesive is pretty sticky and can be used to re-stick the patch or you can use some superglue around the edges
- Take your tail light and put it in an ovenproof dish and heat it up slowly on the lowest oven temperature. If your oven does not decrease temperatures well heat the tail light unit with the oven door one. Keep checking on it to see if it is dry.
You use a warm radiator or put your tail light in an airing cupboard overnight. Keep checking on it to see if it is dry.Do not put the tail light in your microwave. Microwaves can damage your tail light.
- Remove the tail light from the oven, once you see that all the moisture inside has disappeared and the tail light is dry and clear.
- Put the GORE® automotive vent patch back in place. Use a little bit of glue to make it stick
- Seal all the holes around the plastic weld. Don’t just concentrate on where you saw the holes based on the bubbles. Go around all the plastic weld and seal it up to protect it in future. Use liquid electrical tape. Look for the brand made by the same people who manufacture Plastidip. Liquid electrical tape is a rubber compound that will stick to the plastic seams but it also flexible.
The sealant will allow for light unit to flex a little bit as it contracts and expands in the cold and heat. It does not crack, allow any holes or let in any moisture where your tail light unit is exposed to the elements.
- Smear the liquid electrical tape all around the weld, on both sides of the weld and this preempts any holes, cracks in the welding from happening. You can add an extra coat for reassurance.
- The application of the sealant only takes about an hour to dry. Once the tail light unit is dry you can conduct another water test and see if any bubbles emerge. If they do, repeat the process. If not, then your tail light will no longer have any condensation.
- Now return the tail light unit back to the car. It’s the reverse procedure of what you did when you took the tail light out.
- Clip in in with the retaining clips
- Then turn the nut on the bolt with your fingers manually and tighten it using an 8mm socket with a ratchet. Don’t tighten it too much to prevent the introduction of more stress structures in the housing of the tail light unit.
- Once that is held tight put in the connector., ensure it has foam. Make sure that the foam gasket is between the lid and the light unit
- Then take in the plug and push it in until you hear a click.
- Push in tab to lock it into place.
- Using the plastic prying tool, push open the white or blue fasteners.
- Pull out the fasteners held in the trunk lid using a clip removal tool and put them back in the plastic trim. Don’t scratch paintwork or drop fasteners
- Once fasteners are out, slide them into the little slots at the back of the trim and push the plastic trim back on the lid of the trunk
- Push in the trim firmly with your hand. You can pat it in until the plastic trim is clipped in
- Once plastic trim is, shut the trunk, enter your car and test whether the lights are still working
- If the tail lights are working there’s a no need to get a ranger out.